Entertainment
How to paint Ping Pong Table.

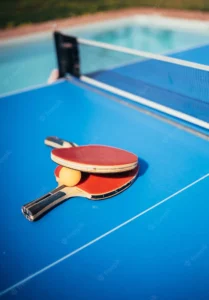
The game of ping-pong, also known as table tennis, has been a favourite pastime of numerous families. It’s a sport played with a tiny white ball and a ping-pong tennis racquet. It is played indoors as well as outdoors by kids as well as adults. If you own a ping-pong table that has been built or needs to be rehabilitated, it is essential to learn how to decorate it. It’s not a simple issue of applying a coat of paint. You need to know the type of paint to choose and how to use those white lines.
Step 1: Get the Equipment and Supplies
Ensure you have all the equipment and materials needed for this project before you begin. You’ll need primer and dark white and green alkyd or chalkboard paint to the surface. The matte finish can reduce glare and is also scratch-resistant and durable. Get two widths of painter’s tap, a couple of paintbrushes or a tray and roller.

Step 2 – Repair Any Damage
Before you begin painting, look for scratches or gouges that require repairs. Apply the wood filler using an apex knife if the damage is severe, and then sand the area and wipe off the sawdust for a transparent surface. Make sure to remove any old paint off the table, in case there’s any. A fresh piece of sandpaper can eliminate any broken or loose colour, as well as any finish that could hinder the new coating.
Step 3. Paint the Primer
Apply a uniform coat of primer on the tabletop in a consistent manner. Allow it to dry thoroughly under the instructions on the product’s label. The product.
Step 4: Lay Tape on the White Lines
The sides and final lines are placed on the table’s edges. The lines are all 3/4 inches thick. The sides lines are through the entire extended length of the table, while the end lines are set along across the table’s size of the table. Additionally, there is a middle line that needs to be taped. It’s 1/8-inch thick and runs across the entire table to the middle.
After the primer is completely dry, measure the table’s length, and mark the exact centre of the size. This is the point where the centre line will be. Utilizing the 1/8-inch painter’s tape, cut a piece lengthwise, from one end on the table and the opposite and keep them as straight as you can. The video should be pressed hard so that green paint does not get beneath it. Next, using the 3/4 inch painter’s tape, make a line across the four sides of your table.
Step 5: Add the Green Paint
Paint two coats with chalkboard paint in green colour. Ensure that the first coat is dry, following the manufacturer’s guidelines, before applying the second coat.
6. Paint White Lines
After the green paint has been fully dry, carefully take your masking tape from the table’s surface. With a small paintbrush, delicately apply two coats of white paint along the lines you want to let completely dry between coats. If you’re not sure you’ll be able to use a free hand to paint the lines in white, you can apply additional masking tape around the edges of the spot where the white paint will go. If you decide to do this, be extremely careful when you remove the tape to ensure you don’t peel off all of the green videos.