Tech
Dell XPS 15 2-in-1 test: Closer to perfect.

Losing your business phone can be a stressful and worrisome experience, especially if you have sensitive data stored on it. However, there are steps you can take to quickly locate your device and ensure that your information remains secure.
By following a few simple strategies, you can increase your chances of retrieving your lost phone and safeguarding your valuable data. Whether you misplaced it at a coffee shop or left it in a taxi, these tips will help you navigate the process of finding your missing device and taking proactive measures to protect your business information.
1. Steps to Take If You’ve Lost Your Business Phone
Source: www.fixxo.in
If you find yourself in the unfortunate situation of losing your business phone, it’s important to act quickly to protect your data and potentially locate your device. The first step is to try calling your phone or using a tracking app to see if you can pinpoint its location.
If that doesn’t work, be sure to notify your IT department or company’s IT support team immediately so they can take necessary precautions to secure any sensitive information that may be on the device. It’s also a good idea to change any passwords or access codes that were stored on the lost phone to prevent unauthorized access.
Lastly, consider contacting your phone carrier to report the phone as lost or stolen, as they may be able to help track it or remotely wipe any data if necessary. Taking these steps promptly can help protect your business’s sensitive information and hopefully lead to the recovery of your device.
2. Quick Tips for Locating Your Lost Business Phone
If you’ve misplaced your business phone, don’t panic. There are a few quick tips you can follow to locate it and secure your data.
First, try calling your phone from another device to see if you can hear it ringing. If that doesn’t work, consider using a phone tracking app to pinpoint its location.
Another option is to check with any nearby businesses or public places where you may have left it behind. Finally, if all else fails, contact your phone provider to remotely lock or erase the data on your device to prevent unauthorized access.
Remember to stay calm and methodical in your search efforts, and hopefully, you’ll be reunited with your phone in no time.
3. Ensuring Data Security After Losing Your Business Phone

After losing your business phone, the first step is to ensure the security of your valuable data. Begin by remotely wiping the device to prevent any unauthorized access to sensitive information.
This can typically be done through a phone tracking app or the manufacturers website. Next, change all passwords associated with your business accounts to prevent any potential breaches.
Contact your IT department or service provider to alert them of the situation and implement additional security measures if necessary. It’s also important to notify any clients or colleagues who may have had contact with your lost phone to beware of potential scams or phishing attempts.
By taking these proactive steps, you can protect your data and minimize the risk of a security breach.
Conclusion
In conclusion, losing your business phone can be a stressful experience, but there are effective steps you can take to find it quickly and secure your data. By using your phone’s tracking capabilities, contacting your service provider, and utilizing tools like Find My iPhone or Android Device Manager, you can increase your chances of locating your device.
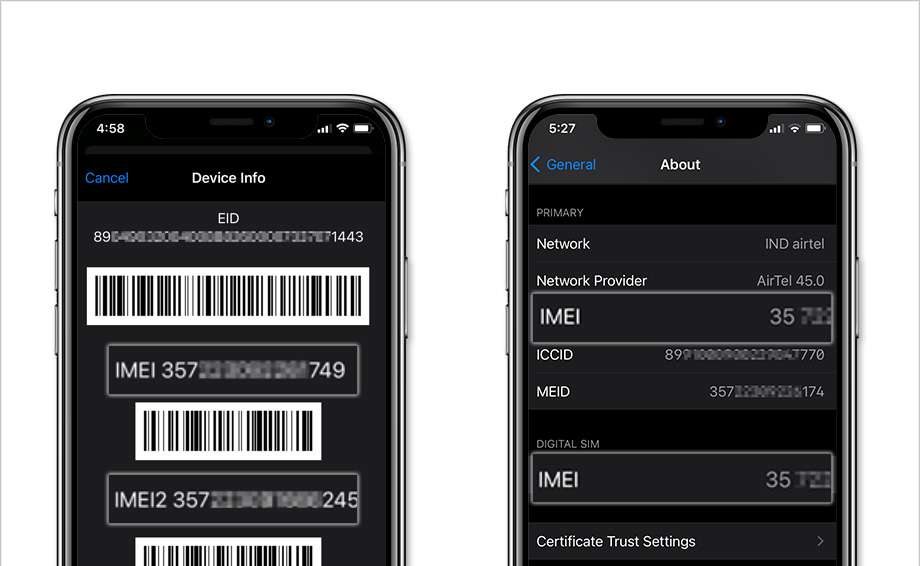
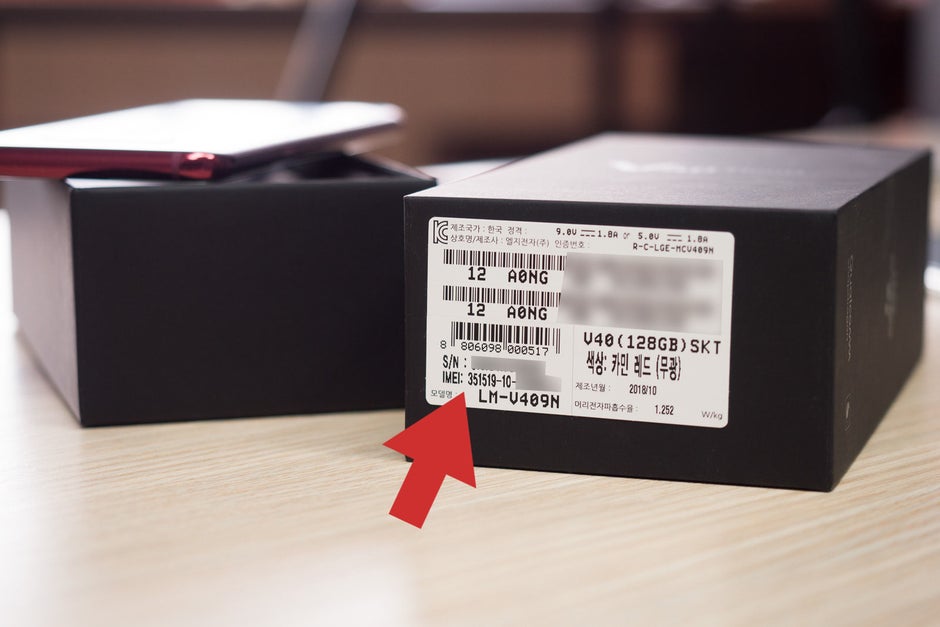
Additionally, it is important to consider the security of your data by remotely locking or wiping your phone if necessary. Remember to also IMEI check check your phones IMEI number to track it down in case it is lost or stolen. By following these tips, you can protect your sensitive information and prevent any potential data breaches.

Embarking on the journey of mastering Looker Studio can be both exciting and overwhelming for beginners. With its vast array of features and capabilities, it\’s important to approach learning this powerful tool with a strategic mindset.
In this article, we will explore four essential tips and tricks to help you get started with Looker Studio in 2024. Whether youre a data analysis newbie or a seasoned professional looking to enhance your skills, these insights will set you on the right path toward leveraging Looker Studio to its fullest potential.
Let\’s dive in and unlock the possibilities that await in the realm of data visualization and analytics.
Introduction to Looker Studio
Welcome to Looker Studio, a powerful platform that allows users to easily analyze and visualize data to gain valuable insights. With its user-friendly interface and robust features, Looker Studio has become a popular choice for businesses looking to optimize their data analysis processes. Whether you are a beginner or an experienced user, Looker Studio offers a range of tools and resources to help you make the most of your data.
In this article, we will explore four tips and tricks to help beginners get started with Looker Studio and harness the full potential of this innovative platform. Let\’s dive in and discover how Looker Studio can transform the way you analyze and visualize data for your business.
Setting Up Your Looker Studio Workspace
 Setting up your Looker Studio workspace is the first step towards optimizing your data analysis workflow. Start by customizing your dashboard layout to fit your needs, whether you prefer a grid layout or a more freeform design.
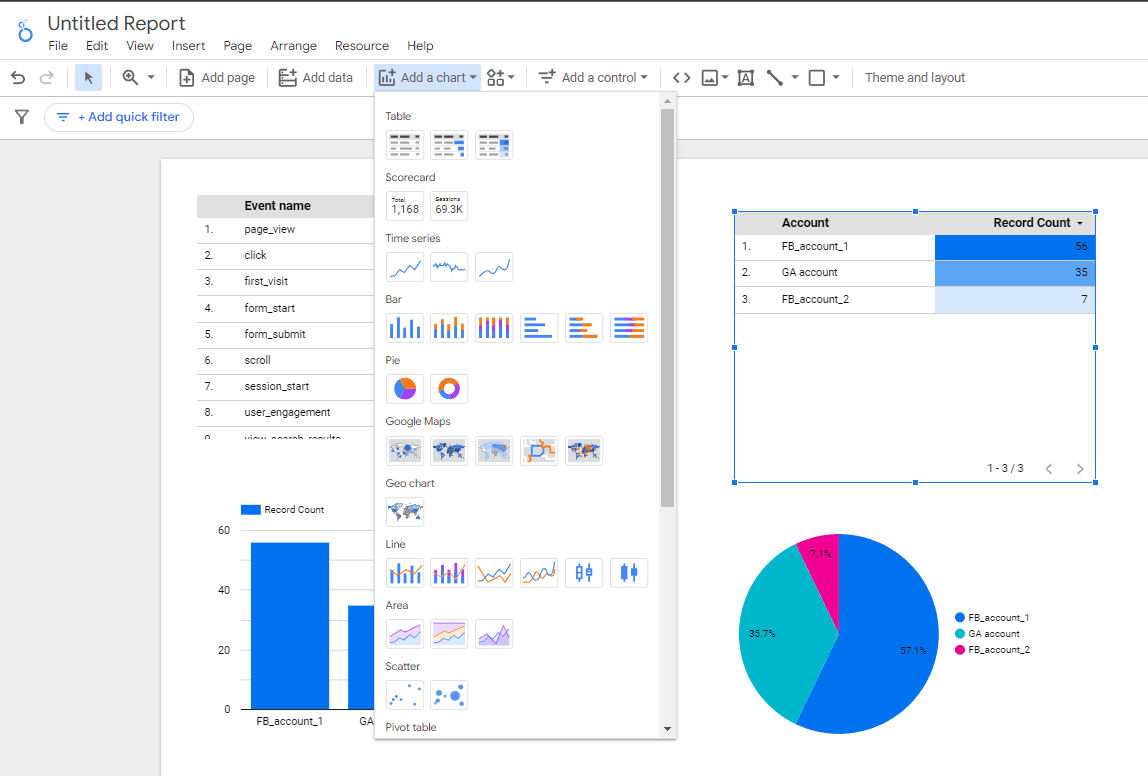
Next, explore the various visualization options available in Looker Studio to display your data in a way that is visually appealing and easy to understand. Don\’t forget to set up alerts and notifications to stay informed of any important changes in your data.
Finally, familiarize yourself with the collaboration features in Looker Studio to work more efficiently with your team members. By setting up your workspace effectively, you can make the most out of Looker Studios\’ powerful data analysis capabilities.
Navigating Looker Studio: 4 Tips for Beginners
 hen diving into Looker Studio for the first time, it can be overwhelming trying to figure out where to start.
With its powerful analytics capabilities, it\’s important to familiarize yourself with the interface to maximize its potential. To help beginners navigate Looker Studio effectively, here are four essential tips to keep in mind. First, take the time to explore the various tabs and menus to understand how different functions are organized.
Next, make use of the search bar to quickly locate specific reports or data sets. Additionally, don\’t be afraid to experiment with different visualization options to find the best way to present your data.
Lastly, do not hesitate to reach out to the Looker community or customer support for assistance if you encounter any challenges along the way. By following these tips, you\’ll be well on your way to becoming a Looker Studio pro in no time.
How to Create Stunning Dashboards and Reports in Looker Studio
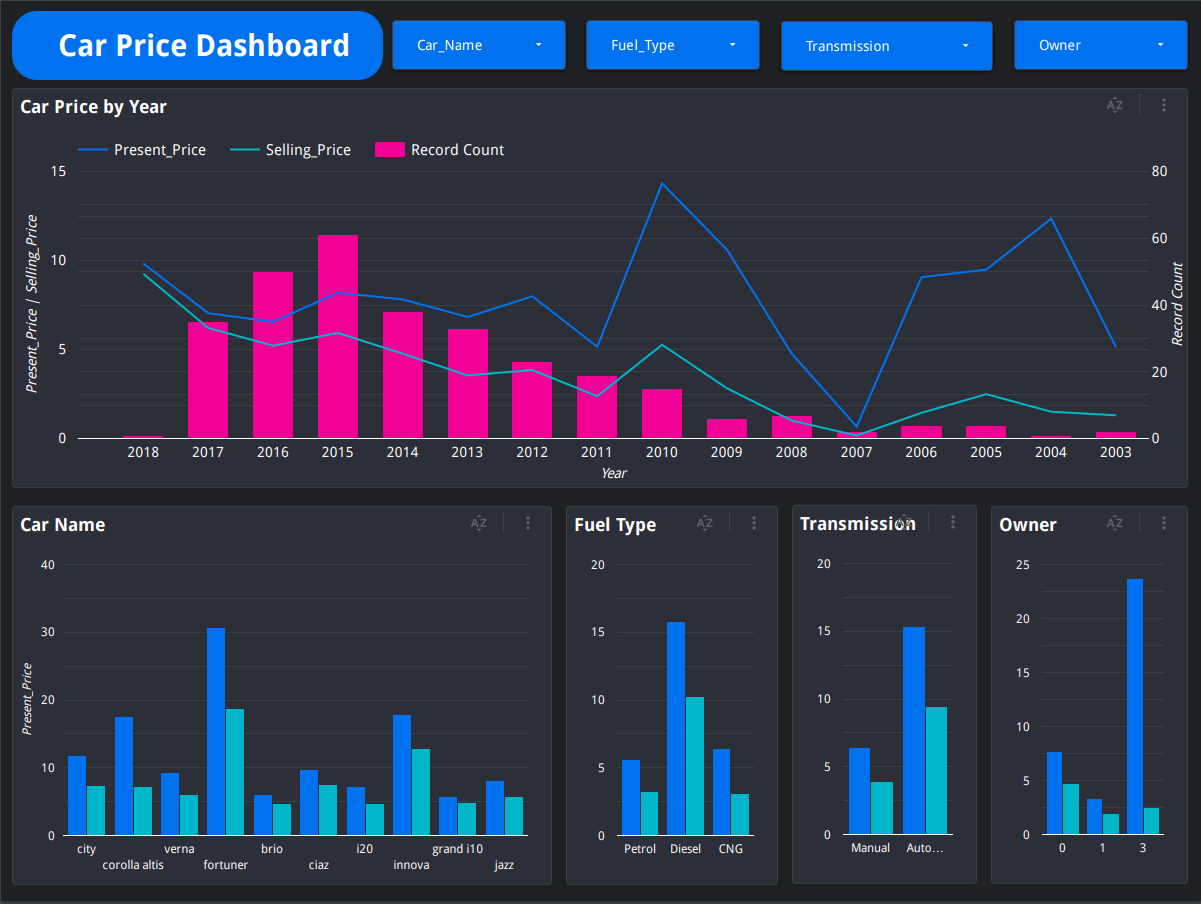 Creating stunning dashboards and reports in Looker Studio can seem like a daunting task for beginners, but with the right tips and tricks, you can easily master this powerful data visualization tool. Start by carefully selecting the data sources you want to include and organizing them logically.
Next, use Lookers drag-and-drop interface to design visually appealing charts and graphs that convey your data insights. Don\’t forget to customize your dashboard with colors, fonts, and branding elements to make it unique to your organization.
Lastly, take advantage of Lookers scheduling and sharing features to ensure your reports reach the right audience at the right time. With a little practice and creativity, you\’ll soon be creating professional-looking dashboards and reports that will impress your colleagues and stakeholders.
Conclusion
 In conclusion, Looker Studio offers a variety of features and functionalities that can help beginners get started on their data analytics journey.
By implementing the tips and tricks outlined in this article, users can optimize their experience with Looker Studio and streamline their data visualization and analysis processes. Additionally, seeking guidance from Looker Studio consulting can provide further support and assistance in utilizing the platform to its fullest potential. With practice and exploration, beginners can harness the power of Looker Studio to drive informed decision-making and unlock valuable insights from their data.

Litigation Funding Transparency, Why The UK Legal Market Is Under Review

Tom Goodhead Rejects Allegations As Pogust Goodhead Moves Under New Leadership
Tom Goodhead News: Allegations Against Pogust Goodhead Founder

Game On: North Texas is a ‘Technology Entertainment Concept ‘Paradise.

Cannondale Information: All-new Topstone Carbon gravel bicycle unveiled.

EU takes steps to legislate sustainable fashion. It will work.
-

 Entertainment4 years ago
Game On: North Texas is a ‘Technology Entertainment Concept ‘Paradise.
-

 Sports4 years ago
Cannondale Information: All-new Topstone Carbon gravel bicycle unveiled.
-

 Fashion4 years ago
EU takes steps to legislate sustainable fashion. It will work.
-

 Business4 years ago
Customer Experience Innovation: The New Battlefield For Businesses.
-

 Fashion4 years ago
Dubai Design District welcomes leading Polish designers to the world-class fashion community.
-

 Business4 years ago
The Defence industry supports hundreds of UK jobs and business.
-

 Entertainment4 years ago
What is Nudekay, and How can I create it?
-

 Business4 years ago
A Guide To Anti-Money Laundering For Your Business.


